How to Draw War Robots Easy
 |
Introduction
This page will help most problems when leveling up to 20, never fear to ask in comment section! This is what this page is about! All your questions will be answered. However, you should read this whole thing carefully before doing anything. Hope this helps you!
Just leveled up to 20?
So, you've just leveled up to 20? Congratulations! If you have problems with your robots, eg. Too weak or not enough damage dealt, then follow these steps.
1. The best robots for your level right now is the Griffin, Leo and Natasha. You will need at least two of these robots to deal with other robots.
2. Make sure all your robots are level 6 and all your weapons level 5. Resist the temptation to speed up upgrades. This will waste your gold. However, do not upgrade these weapons and robots, as they are a waste of silver:
Robots:
Destrier
Cossack
Vityaz
Golem (removed)
Boa (removed)
Schutze (removed)
Weapons:
Nashorn
Gekko (unless you have more than one)
Noricum (unless using on Natasha with Zenits)
Zenit (unless using on Natasha with Noricums)
All of the rules above followed?
After you have done all that, you might have a question: "What do I put on my Griffin, Natasha or Leo?" This can be found on the wiki. But if you're not bothered, here are some suggestions (more advised setups are listed here):
| | Leo | ||||
|---|---|---|---|---|---|
| Heavy Slot (x 1) | | | | | |
| Light Slot (x 3) | | | | | |
| Light Slot (x 3) | | | | ||
| | Natasha | ||||
| Heavy Slot (x 2) | | | | ||
| Light Slot (x 2) | | | | ||
| Light Slot (x 2) | | | |||
| | Griffin | ||||
| Medium Slot (x 2) | | | | | |
| Light Slot (x 2) | | | | | |
| Light Slot (x 2) | | | | | |


Workshop 2.1
SPOILER ALERT WORKSHOP FEES ARE INSANELY EXPENSIVE AND IT WILL COST YOU AT A MINIMUM 12,500,000 AND UP TO 48,430,000 SILVER, AND MORE THAN A MONTH OF WAITING.
This is a production line unlocked at level 21. You can make components with the choice of taking one day to produce, or taking three days to produce. The one day pack is more cost and time efficient, whereas the three day pack gives you more components in one go. If you are active, use the one day pack. If you are are not, then use the three day pack.
When you start, you don't want to produce expensive stuff like Spectres or Shocktrains right away, as it will drain your silver a lot and cost a lot to upgrade. The most efficient ones to produce are Halo or Shredder, or other that has less range than 600 meters (a Tempest, for example, has a range of 800 meters, thus it is not advised to produce). You should start producing straight away, and only produce ONE item. You unlock a new slot (up to 6) every 5 levels.
You get loads of silver when you use the workshop at first, and save it up to get your most prized possession as high leveled as possible, most preferably a single gold heavy weapon or a good component weapon. Workshop 2.0 will give you silver & gold (on some levels) every level, the most being 3,300,300 silver at Workshop level 31. The first 15 levels are the easiest and you would expect to receive millions of silver!
Here are some robot suggestions: (increasing in price)
Lancelot, Falcon, Raven, Inquisitor, Mercury, Invader. Spectre, Nemesis, Blitz, Mender, Ares, Ao Jun are the most powerful, but are exorbitant!
Here are some weapon suggestions: (increasing in price)
Spark, Halo, Shredder, Scourge, Viper, Glory, Exodus, Corona, Pulsar, Redeemer. Ember is powerful but still, too expensive. Vortex is also viable if you have at least 2 on a same robot. Flux has a range of 1,100m but if you prefer long range sniping, make sure to have at least 2 or pair it with 2 or more Gekkos (cost 750 gold). Don't buy Gekkos if you do not have them, get them from silver chests in the Black Market or don't get them at all.
Bored of old robots?
If you are bored of your rusty old Leos, Griffins or Natashas, why not try out the mid-league robots? Use silver to buy Fujins and Docs and test your luck by opening Silver Chests. You can get the Raijin, Rhino and many others from the Silver Chest. Here are some suggestions:
Note: all suggestions are silver or gold based. For more info, check here or go to specific robot page.
| | Raijin | ||||
|---|---|---|---|---|---|
| Heavy Slot (x 2) | | | | | |
| | Rhino | ||||
| Medium Slot (x 2) | | | | ||
| Light Slot (x 2) | | | | ||
| Light Slot (x 2) | | | | ||
| | Lancelot | ||||
| Heavy Slot (x 1) | | | | ||
| Medium Slot (x 2) | | | | ||
| Medium Slot (x 2) | | | |||
| Medium Slot (x 2) | | | |||
| | Rogatka | ||||
| Medium Slot (x 2) | | | | | |
| | Fujin | ||||
| Medium Slot (x 3) | | | | | |
| | Fury | ||||
| Heavy Slot (x 3) | | | | | |
| | Butch | ||||
| Front Heavy Slot (x 2) | | | | | |
| Back Heavy Slot (x 2) | | | | | |
| Back Heavy Slot (x 2) | | | | | |
| Back Heavy Slot (x 2) | | | | | |
| Back Heavy Slot (x 2) | | | | | |
| Back Heavy Slot (x 2) | | | | | |
| | Doc | ||||
| Medium Slot (x 2 front) | | | | | |
| Medium Slot (x 2 back) | | | | | |


How to deal with normal bots
It may be hard to deal with these bots, so here are some strategies to overcome them.
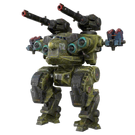
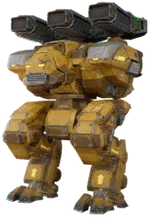
Griffin
When fighting a Griffin, if you are using Orkan or Tulumbas, make sure the enemy jumps first. Wait until he lands, because if you use your rockets, its jump will dodge most of your rockets, and it will then kill you afterwards. Also, when it jumps, it has a split second of landing lag (where it can't move) which will render him vulnerable. If you want to shoot it during a jump, aim a little in front of it as it jumps. Weapons that hit instantly, like Punisher or Taran, will be effective against a Griffin. Its jump won't save it from these weapons. Be aware that other users can execute this manoeuvre against you, so your Griffin will quickly become obsolete if too many people use this against you.
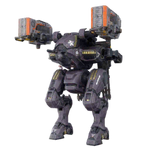
Leo
Leo is a very tough robot. It has a LOT of health, and it is still used up to Expert League. When fighting a Leo, they usually have a Thunder and three Pinatas on it. So don't stay too close to it, or you will get annihilated in a matter of seconds. Try to use some mid-range weapons, like Pin-Tulumbas or Molot T-Molot or stay in cover and fire Spirals or Aphids. This way you can drain its health very effectively. There's no other setup that will kill Leo quickly except for high DPS weapon setups like Orkan-Pinata or Taran-Magnum. Or you can simply outbrawl it with a Avenger Raijin or Taran Fujin.
Natasha
When dealing with Natasha, try to use shotguns or machine guns because it has a large frame, which is a convenience for both weapon types. You can also use Molot to hit Natasha from a safe distance. Enemy Natasha is usually equipped with Thunder with Pinata. Don't underestimate the Natasha at close range. As your league goes up, you might see some with Trident and Pin. It's a very powerful mid-ranger. You will be heavily damaged if you are not using Dash bots (they cost a LOT) or something with energy shield or you are using a long range setup.
Fujin
Fujin has the strongest energy shield in the game. To kill a Fujin, you have to use Energy weapons because Fujin itself doesn't have a lot of health. If you don't have energy weapons, try to kill it with some ally help. Shotguns (Thunder, Storm, Gust) is the best choice because energy shield absorb most, if not all bullets from the shotguns even from 500m distance, which will drain its energy shield very fast. After draining the shield, allies with high burst damage weapons will take care of the rest of Fujin!
How to deal with Component robots
As you progress up the levels, you might find that you start fighting more OP bots with abilities like Dash or Glide. These can only be acquired with a large amount of gold or 10000 Components, of which can be produced via Workshop 2.0. In order to cope with these robots, you will need:
At least 2 Orkans, 2 Tarans and 2 Magnums, and robots to put them on. Suggestions include:
Galahad
Fujin
Doc
Rogatka
Gareth
Griffin
Rhino
...
These are the Component robots you may need to deal with:
Lancelot
This bulky robot is a dangerous and intimidating threat. And what makes it worse is that it has the ability to mount an Ancile, truly making it an unstoppable fortress capable of blocking all kinds of projectiles, except for Ember & Igniter & Blaze which are special weapons. The only downside of the Lancelot is the lack of mobility, even with its Rush ability and a very large surface area. When facing a Lancelot, try to use Orkans to quickly eliminate it, as prolonging the battle will only make your chances of survival slimmer. Using Molots, Punishers or to a lesser extent, Thunders at a far distance is also a good idea, due to the fact that the bullet spread can hit Lancelot's unprotected area, weakening the bot in the process. It is also good at knocking out the Ancile shield and the physical shields really quickly. For mid-range support, Tulumbas and Pin can weaken the bot and its physical shields at the same time. However, if the enemy proves to be a bit difficult to tackle with, you can easily run away or team up with some allies to kill it.
Kumiho
To deal with this, fire off a few shots to make it dash, then when it is out of dashes (it only has two, with a 5 second reload) unleash your full salvo upon it. It is frighteningly fast, so be careful as you might find that you are the one getting killed. Unfortunately, it only has two medium weapons, so therefore cannot usually win against robots of more firepower and health. However, do not underestimate this.
Haechi
To deal with this, as it is very powerful boasting three mediums, shoot at its energy shield to take it out. It is a weak shield so do not worry. Plasma weapons will go through the shield. Stay out of its range, but if you can't, do not pick a fight with it. Carefully take out its shield, and when it is distracted, quickly attempt to take out it without getting noticed. Be careful, this bot can swoop out and kill you instantly without you even noticing.
Bulgasari
To deal with this, use its slowness as an advantage. Do not underestimate it. It has a powerful built-in physical shield which can be used to protect its left flank. All of its three medium weapons are at one side so corner-shooting will do immense damage. The best way to kill it is to use Rocket weapons such as Orkan or Tulumbas or powerful long-range weapons like Trebuchet, although it can block the shot with its shield. This is the most powerful Dash robot along with Haechi.
Hover
This is a nimble yet sturdy bot which can literally glide 500m into the map if used right. It is a very annoying bot which can drop down upon unsuspecting enemies and take them out with its Orkans or Tarans or capture beacons easily. It has only one fatal disadvantage - it has a seven second cooldown when it lands on the ground, before the ability can activate again. The ideal method of taking one out is to hide behind walls or buildings, and when it touches down, pop out, and kill it. Be careful as it has very high HP for a fast bot, 190,000 HP at lv12. If it gains the upper hand even by a couple thousand damage, you are pretty much doomed.
Hellburner
If you want to survive an encounter with one of these, follow this advice. Its Overload ability grants it with an enormous speed boost and the ability to explode, doing massive damage to enemies. It has to charge in as it has to be within 75m to deal damage. The self-damage has been removed. In higher leagues you will often see one with Ancile/Ecu, Ember/Halo or Avenger/Shredder equipped. In lower leagues, Thunder/Pinata is often used. Stay away from it and deal as much damage as you can. When you kill it, it will release a shockwave that does half damage as the normal ability, ignoring the 5 second charge up entirely. It can be an unpleasant surprise. Try not to group together and get away from it as fast as you can. If it gets too close, and it inevitably will unless killed soon enough, you are doomed, or at the very least sustaining enormous damage.
Bulwark
The Bulwark has a LOT of health. Combined with its build-in physical shield and the special Aegis shield - a yellow energy shield which can block literally anything, it is a enormous threat to your bots. Unlike the normal energy shield, however, the Aegis shield doesn't regenerate while it's active and one has to turn it off in order to charge up the shield. Equipped with x2 Dragoon, it can dominate the entire battle from a mid-range position. With x2 Avenger it becomes an indestructable brawling machine. In the lower leagues, Bulwark is usually equipped with x2 Thunder. When encountering a Bulwark, you have to work with allies to take this thing down. One person need to drop the Aegis shield with Thunders or Punisher T. Then the other must kill it quickly with Orkan and Pinata to bypass the physical shield. Be careful, as the Aegis shield when deactivated regenerates at a very quick pace. The longer you wait, the harder it will be to destroy it. Remenber that the Aegis shield CAN NOT regenerate while it's active, so once you take it down, that's the perfect opportunity to open fire. Some inexperienced Bulwark players may don't know how to play it properly, like not turning off the shield immediately when it's down, so take advantage of that and kill it as soon as possible to avoid it from making any retaliation.
Pursuer
The Pursuer has decent health, and the speed of this robot is really quick. You usually see pursuer capturing a beacon, or somehow it's in your base equipped with gust and/or halo. When you see it capturing a beacon, fire at it before it enters the beacon, so it will activate stealth for 10 seconds. Capturing beacon needs 10 seconds to turn the color completely. So when it come out of stealth, shoot all you've got to him, try to kill it before it captures the beacon. If you find in your base, try to get a teammate to kill it. In a one on one, even you have Quantum Radar, the risk is pretty high. You and your teammate fire at it when it's coming, if he activates stealth, then hide behind cover. Walk around to try not to let him get you. After stealth gone, rush him as hard as you can , to not let it activate stealth again.
Fury
Fury has a lot of health and firepower, but really slow. This robot is usually equipped with Zeus, Trident, Trebuchet, Thunder, and sometimes Avenger. You usually see a Fury sit back, fire a lot and really annoying, sometimes suppress your whole team. To counter a Fury, you need a teammate with energy shield or physical shield. When approaching the Fury, try to go together, and focus it once you get in range. If you are fighting an avenger fury, which is a really dangerous target, you will need 3 people. Avenger has a lot of damage output, it can literally kill 2 people in one clip. So here is what the third person for. When an Avenger Fury is reloading, catch him and destroy the robot.
Doc
Doc is a powerful robot. The variety of weapons might equipped on this robot is a lot. Countering a doc is really easy, you just need to fight him smart. Use a robot with a lot of health and some firepower, it doesn't need a lot of firepower. Since doc can only use 2 medium weapons at same time, it isn't as dangerous as spectre. After you get into your range you can just shoot him. He will either hide or killed. If he successfully hide behind cover, and if there's no other enemy, you can go close to him. Doc isn't good at brawling, so there will be a very big chance that you will win the fight (if you have enough health).
Butch
Butch has a lot of health, and the speed is pretty fast for a heavy robot. You usually see it at long range, sometimes at short range with Thunders. At long range it's usually equipped with Trebuchet, Zenit or Nashorn. At short range it's usually equipped with Thunder, and this weapon is really bad for butch because it's not a brawler. If you meet Butch at close range, attempt to face-hug him if you are using close-ranged weapons. Orkans will suffice at 200-300m. Do not be scared because Butch is a relatively simple bot and its only perk is that it can Quick-Draw. Killing a Butch at long range is pretty hard since you need to walk all that distance to get there, and there are his teammates in your way. Try to use some mid-range weapons like Tulumbas or even Molots...Those are really good weapons to counter butch at long range.
Above component robots are usually owned by pilot between level 20 to 25. If you find else robots that are not there, check the robot's name and go to its page, to see the strategy to counter them. Or mention it to Sky Avenger 2.0 or I didn't spend money in this game so they can add a personalized strategy. Please comment below or on Sky Avenger's profile if there is anything you would like us to fix.
Source: https://warrobots.fandom.com/wiki/Guide_for_Level_20_to_25
0 Response to "How to Draw War Robots Easy"
Post a Comment